Deploying Nvidia GPU Operator
Welcome to part one of “Unlocking AI & ML Metal Performance with QBO Kubernetes Engine (QKE)”. Today, we’ll walk you through the setup process for Nvidia GPU Operator in QKE.
QBO Kubernetes Engine (QKE) offers unparalleled performance for any ML and AI workloads, bypassing the constraints of traditional virtual machines. By deploying Kubernetes components using Kubernetes-in-Docker technology, it grants direct access to hardware resources. This approach delivers the agility of the cloud while maintaining optimal performance.
NVIDIA GPU Operator plays a crucial role in enabling organizations to harness the power of NVIDIA GPUs for AI and machine learning workloads in Kubernetes environments, leading to faster innovation, improved model performance, and greater efficiency in AI deployments.

QBO Configuration
- Get version
To begin, we’ll retrieve the QBO API version using the QBO CLI. The QBO CLI facilitates interactions with the QBO Cloud API through the exchange of JSON messages within a bidirectional communication system supported by websockets. The same QBO CLI is used for Cloud and Community Editions.
qbo version | jq .version[]?
1. Add cluster
Now, we’ll proceed to set up a Kubernetes cluster consisting of three nodes, utilizing a Kubernetes version supported by Kubeflow. Specifically, we’ll deploy Kubernetes v1.25.11.
qbo add cluster $NAME -i hub.docker.com/kindest/node:v1.25.11 | jqNow, we can observe the creation of nodes in real-time, presented both in a neural graph format and in a tabular format. These representations are built from the JSON messages exchanged from the QBO API

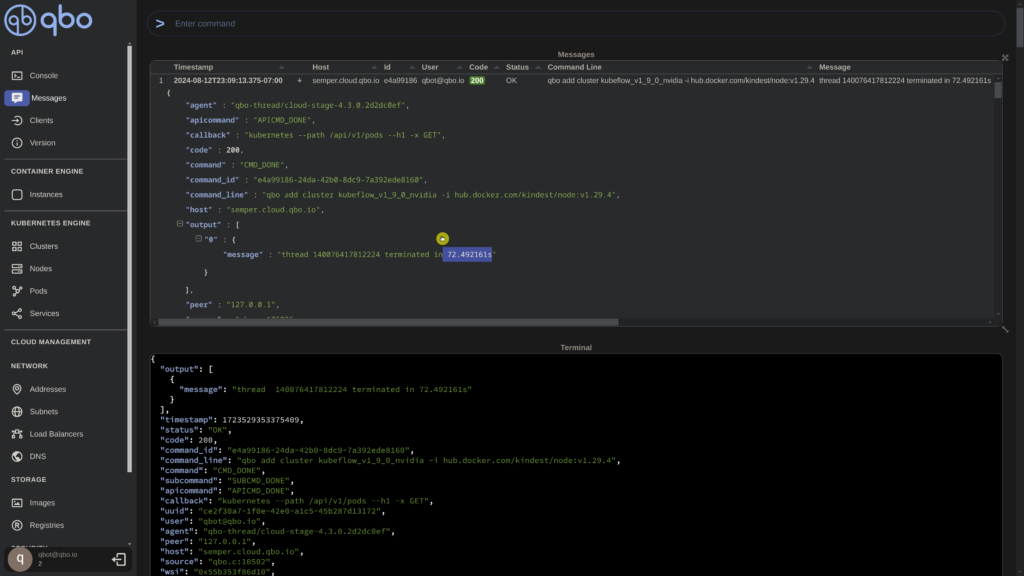
Additionally, we have access to the logs generated during the cluster creation process. By expanding the latest log entry, we can examine the raw JSON data, which confirms the successful completion of the thread responsible for creating the Kubernetes cluster.
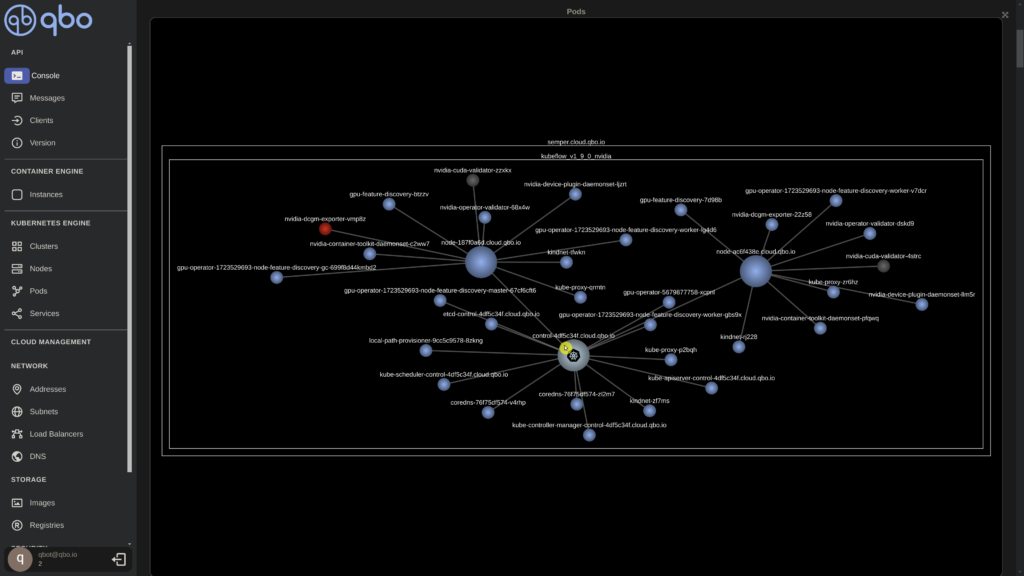
Similarly, we can monitor the pods in real-time, observing their creation and state updates as they occur. All pods displayed here pertain to Kubernetes components generated during the cluster creation process within the kube-system namespace.

It took approximately 80 seconds to create a 3-node cluster from scratch. As a final step, let’s verify the nodes using the QBO CLI. (Show thread termination time)
qbo get nodes $NAME | jq .nodes[]?"1. Get kubeconfig
Now that all nodes are operational, let’s retrieve the kubeconfig file, allowing us to manage them through the Kubernetes API using kubectl.
qbo get cluster $NAME -k | jq -r '.output[]?.kubeconfig | select( . != null)' > $HOME/.qbo/$NAME.confKubernetes Configuration
1. Export kubeconfig
Let’s export our configuration file so it can be used by kubectl
export KUBECONFIG=$HOME/.qbo/$NAME.conf2. Get nodes with kubectl
Verify we can get the nodes
kubectl get nodesExciting news! We now have a three-node cluster running Kubernetes-in-Docker, set up in seconds with qbo. Next, let’s proceed to deploy the Nvidia GPU operator.
Nvidia GPU Operator
1. Add helm chart
Now it is the time to install the Nvidia GPU operator for Kubernetes. We are going to add the helm chart
helm repo add nvidia https://helm.ngc.nvidia.com/nvidia || true2. Update helm chart
then update
helm repo update3. Install GPU operator
and finally install the Nvidia GPU Operator
helm install --wait --generate-name -n gpu-operator --create-namespace nvidia/gpu-operator --set driver.enabled=false4. Wait for pods to come up
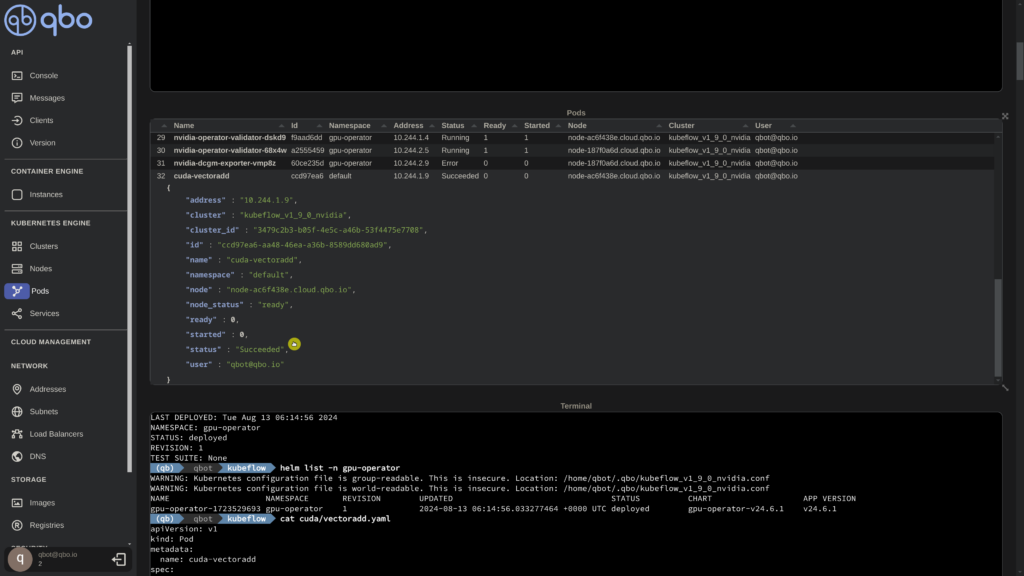
We’ll now wait for all the pods to be up and running. You have the option to view in real-time the pods either through the neural graph pod view or in a tabular format as they initialize. Ensure that all pods are in the ‘Running’ state, (not ‘PodInitializing’) in the tabular table or blue in the neural graph.
The Nvidia GPU Operator seems to be up and running. Now, let’s ensure that the GPU is functioning correctly.
CUDA’s capability to leverage the immense computational power of NVIDIA GPUs for AI and machine learning applications has become essential for researchers, data scientists, and developers in the field of artificial intelligence. With that in mind, let’s proceed to test with a sample CUDA application.
Sample Cuda Application
1. Vector add application
We’re now prepared to deploy a CUDA application. For this demonstration, we’ll utilize a CUDA vector add application, which will be deployed as a pod, leveraging the GPU to execute a vector addition operation. Here is yaml configuration for the app.
cat cuda/vectoradd.yaml
apiVersion: v1
kind: Pod
metadata:
  name: cuda-vectoradd
spec:
  restartPolicy: OnFailure
  containers:
  - name: cuda-vectoradd
    image: "nvcr.io/nvidia/k8s/cuda-sample:vectoradd-cuda11.7.1-ubuntu20.04"
    resources:
      limits:
        nvidia.com/gpu: 1
Let’s proceed with deploying the application and verify whether it can effectively utilize our GPU for the intended operation
kubectl apply -f cuda/vectoradd.yamlWait for pods to come up
Now we await the creation of the pod and the completion of the operation. Afterward, we can confirm the success of the application by examining the logs.
kubectl logs cuda-vectoraddGreat news! The operation has been successfully completed using the GPU. We observe the successful addition of a vector containing 50,000 elements leveraging the GPU.
With a fully functional 3-node Kubernertes-in-Docker cluster now in operation, equipped with the Nvidia GPU Operator, and having validated the GPU’s functionality through our CUDA operation, we have successfully concluded our testing. Yay!
Thank you! Next up is Unlocking AI & ML Metal Performance with QBO Kubernetes Engine (QKE) Part II – Deploying Kubeflow where we’ll build upon this configuration to deploy Kubeflow in QBO.